How to install OTRS 5 Free on CentOS 7

Check IP
ipp addr

Update packages
yum clean all
yum -y update

yum -y install wget
yum -y install mc

Install webmin
wget http://prdownloads.sourceforge.net/webadmin/webmin-1.791-1.noarch.rpm
yum -y install perl perl-Net-SSLeay openssl perl-IO-Tty
rpm -U webmin-1.791-1.noarch.rpm

Deactivate SELinux

Check status with: sestatus
Edit /etc/selinux/config
set SELINUX=permissive.

Type setenforce Permissive

yum -y install mariadb-server
open the file /etc/my.cnf and add following lines under the [mysqld] section:
max_allowed_packet = 20M
query_cache_size = 32M
innodb_log_file_size = 256M

execute:
systemctl enable mariadb.service
systemctl start mariadb.service

/usr/bin/mysql_secure_installation
follow the on-screen instructions to set a database root password, remove anonymous access and remove the test database.

yum -y install epel-release
yum install -y mod_perl “perl(Crypt::Eksblowfish::Bcrypt)” “perl(JSON::XS)” “perl(GD::Text)” “perl(Encode::HanExtra)” “perl(GD::Graph)” “perl(Mail::IMAPClient)” “perl(PDF::API2)” “perl(Text::CSV_XS)” “perl(YAML::XS)”

Download OTRS Free for CentOS
wget http://ftp.otrs.org/pub/otrs/RPMS/rhel/6/otrs-5.0.8-01.noarch.rpm

Install:
yum install –nogpgcheck otrs-5.0.8-01.noarch.rpm

systemctl enable httpd.service
systemctl start httpd.service

/opt/otrs/bin/otrs.CheckModules.pl

The next step is to configure OTRS using the web installer
http://localhost/otrs/installer.pl
insted of localhost use hostname or IP of your server

Start the OTRS daemon and activate corresponding watchdog cron job (this must be done by the otrs user):
su otrs
/opt/otrs/bin/otrs.Daemon.pl start
/opt/otrs/bin/Cron.sh start


How to Upgrade Standalone ESXi 5.5 to 6.0

Download the the offline bundle (depot file) for ESXi 6.0 from here
filename VMware-ESXi-6.0.0-2494585-depot.zip

Activate SSH, shut down all your VMs and enter maintenance mode

Upload the file to your datastore

Note: If you run the command with “install” switch, all your personalized drivers of officially unsupported NICs will be deleted. You might consider using the second command with the “update” switch instead (you can add option –dry-run to perform a dry-run only)

esxcli software profile update -d /vmfs/volumes/datastore1/VMware-ESXi-6.0.0-2494585-depot.zip -p ESXi-6.0.0-2494585-standard


more info

Patch ESXi 5.5 to ESXi 6.0 – Lab Time

ESXi Offline Bundle Download – To Upgrade ESXi

How to Upgrade Standalone ESXi 5.0 to 5.1

Download the the offline bundle (depot file) for ESXi 5.1 from here
filename VMware-ESXi-5.1.0-799733-depot.zip

Activate SSH, shut down all your VMs and enter maintenance mode

Upload the file to your datastore

Note: If you run the command with “install” switch, all your personalized drivers of officially unsupported NICs will be deleted. You might consider using the second command with the “update” switch instead (you can add option –dry-run to perform a dry-run only)

esxcli software profile update -d /vmfs/volumes/datastore1/VMware-ESXi-5.1.0-799733-depot.zip -p ESXi-5.1.0-799733-standard

For upgrading to ESXi 5.5:
esxcli software profile update -d /vmfs/volumes/datastore1/VMware-ESXi-5.5.0-1331820-depot.zip -p ESXi-5.5.0-1331820-standard –dry-run

more info

ESXi Free – how to upgrade to ESXi 5.1

VMWare: Update Standalone ESXi 5.0 to 5.1 Using a Depot Zip File


you may got error like this:
[DependencyError]
VIB Broadcom_bootbank_scsi-bnx2i_2.70.1k.v50.2-1OEM.500.0.0.472560 requires com .broadcom.cnic_register-9.2.0.0, but the requirement cannot be satisfied within the ImageProfile.
VIB Broadcom_bootbank_net-cnic_1.11.18.v50.1-1OEM.500.0.0.472560 requires com.b roadcom.cnic_register-9.2.0.0, but the requirement cannot be satisfied within th e ImageProfile.
VIB Broadcom_bootbank_net-bnx2x_1.70.34.v50.1-1OEM.500.0.0.472560 requires com. broadcom.cnic_register-9.2.0.0, but the requirement cannot be satisfied within t he ImageProfile.
VIB Broadcom_bootbank_net-bnx2_2.1.12b.v50.3-1OEM.500.0.0.472560 requires com.b roadcom.cnic_register-9.2.0.0, but the requirement cannot be satisfied within th e ImageProfile.
Please refer to the log file for more details.

one option is to run upgrade with -install option instead -update option.
or you may run:
esxcli software vib remove –vibname=scsi-bnx2i
esxcli software vib remove –vibname=net-cnic
esxcli software vib remove –vibname=net-bnx2x
esxcli software vib remove –vibname=net-bnx2

type reboot…

start upgrade process again…

reboot

exit maintenance mode
more info on:
https://communities.vmware.com/thread/482214?start=15&tstart=0

How to Patch VMware ESXi Standalone Host (5.0.0)

Download latest patch from VMware ESXi 5.0.0
http://www.vmware.com/patchmgr/download.portal

for ESXi 5.0.0 latest patch (at time when writing this is) is
ESXi500-201510001 build number 3086167
filename ESXi500-201510001.zip

upload this file to ESXi datastore

put the host into Maintenance mode

enable SSH via vSphere client via configuration > Security Profile > Properties > SSH

Connect via SSH

Type this command for update: (you can add option –dry-run to perform a dry-run only)
esxcli software vib update -d /vmfs/volumes/<your_datastore>/ESXi500-201510001.zip

when update is finished type reboot or reboot via vSphere client

after reboot you can check build number
esxcli system version get


Installing Active Directory on Windows Server 2012 R2

I will go trough basic steps for installing Active Directory on Windows Server 2012 R2. I will not go trough network or routing configuration. I assume network is already set up.  I will also not go into all available options during install. I will just go trough steps to install Active Directory Services. I will use fresh installation of Windows Server 2012 R2.

Open ‘Server Manager’ and open ‘Local Server’. On this screen set ‘Computer name’, ‘IP address’, ‘Time zone and time’. You can also enable ‘Remote Desktop’, disable ‘IE Enhanced Security configuration’ and set ‘Windows update’ settings.

To change the conputer name click computer name and ‘System Properties’ will open. Then click on ‘Change’ button.

Type new name for the server and click OK.
ads-image03

After you change server name you should reboot you computer before you proceed. Click OK.
ads-image04

When server is restarted open ‘Server Manager’ and open ‘Local Server’.  From here you can also change IP address. Active Directory server should have fixed IP address. Change IP to static.
Right click on you network adapter and choose (with left click) ‘Properties’
ads-image05

Select ‘Internet Protocol Version 4’ and click ‘Properties’
ads-image06

Enter your IP settings for your network. Click OK to finish.
ads-image07

When you finish setting basic settings for you server, name, ip … You can start installing Active Directory. From ‘Server Manager’ click on ‘Manage’ and choose ‘Add Roles and Features’
ads-image08

The ‘Add Roles and Features Wizard’ will start. Read and click ‘Next’.
ads-image09

For ‘Installation type’ select ‘Role-based or feature-based installation’. Click ‘Next’.

Select your server and click ‘Next’
ads-image11

Select ‘Active Directory Domain Services’
ads-image12

When you select ‘Active Directory Domain Services’ you will be prompted to add features that are required. Click ‘Add Features’
ads-image13

Active Directory Domains Services is Selected.
ads-image14

Select ‘DNS Server’.
ads-image15

When you select ‘DNS Server’ you will be prompted to add features that are required. Click ‘Add Features’
ads-image16

DNS Server is selected. Click ‘Next’.
ads-image17

Click ‘Next’.
ads-image18

Click ‘Next’.
ads-image19

Click ‘Next’.
ads-image20

On ‘Confirm installation selections’ click ‘Install’ to start installing Active Directory Domain Services.
ads-image21

If you closed ‘Add Roles and Features Wizard’ skip the next step.

When installation is finished you can click on ‘Promote this server to a domain controller’.
ads-image22

You can also promote server to domain controller from ‘Server Manager’. Click on yellow exclamation mark and select ‘Promote this server to a domain controller’.
ads-image23

Choose ‘Deployment operation’. In this example I’m installing new forest. Enter ‘Root domain name’. Click ‘Next’.

You can select ‘functional level of fores’ and you need to enter ‘Directory Services Restore Mode password’. This is NOT password that you will use to log on to new domain. This password you will use if something goes wrong with your Active Directory.
When you need to repair your  Active Directory you will have to start Windows Active Directory server in ‘Directory Services Repair Mode’ and you will use this password to log in. Hopefully you will never have to use it. But keep this password in case you need it.
Click ‘Next’

Click ‘Next’

In ‘Additional option’ wizard will use first part of you FQDN. You don’t need to change it.
Click ‘Next’

Click ‘Next’

Click ‘Next’

Click ‘Install’ to start domain controller promotion.

Installation will start. Server will reboot automatically when installation is over.

Domain Administrator password will be same as Administrator password before you promoted server to Domain Controller. Domain Controller does not have ‘Local Security’ and does not have ‘Local Administrator’ account. On domain controller you can log on only using Domain Administrators credentials.
ads-image33

Now you have new menus in ‘Server Manager’
ads-image34

When you check TCP/IP v4 settings you will notice that Preferred DNS is set to 127.0.0.1. Domain controller will query DNS server on itself that was installed during domain controller promotion. DNS is ‘heart’ of Microsoft Active Directory Services. Do not change this settings.
ads-image35


If you check forwarder settings in DNS server settings you will notice that forwarder is set to DNS server that was preferred DNS server before domain controller promotion.

This way server will query local DNS server who will forward query to your ISP or other DNS server you used before installing local DNS server.
ads-image36

Enjoy your new Domain controller.


Installation instructions for openITCOCKPIT

This are installation instructions for openITCOCKPIT. This instructions are based on installing openITCOCKPIT on openSUSE 12.2.

1. Installing openSUSE-12.2

Use openSUSE-12.2-NET-x86_64.iso and select minimal text mode installation.

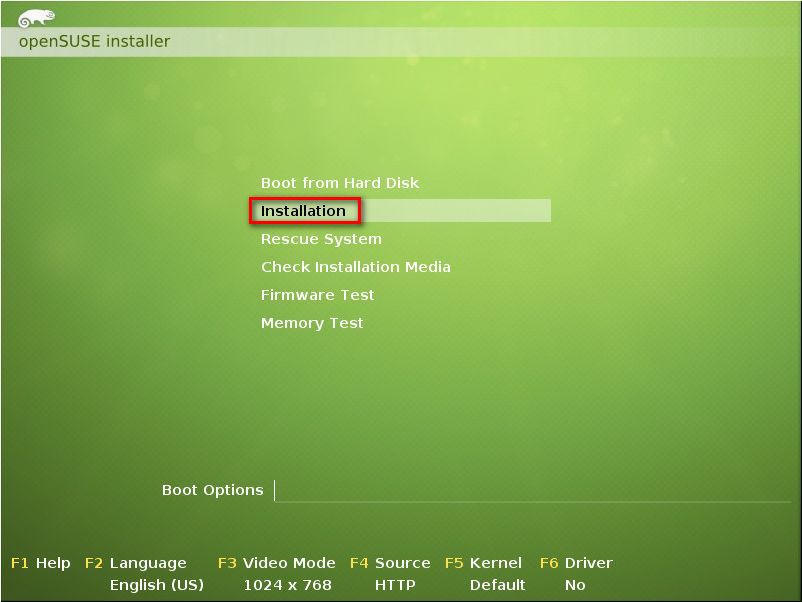
Download image (247MB), burn to CD, boot from CD and choose “Installation”
Image00002

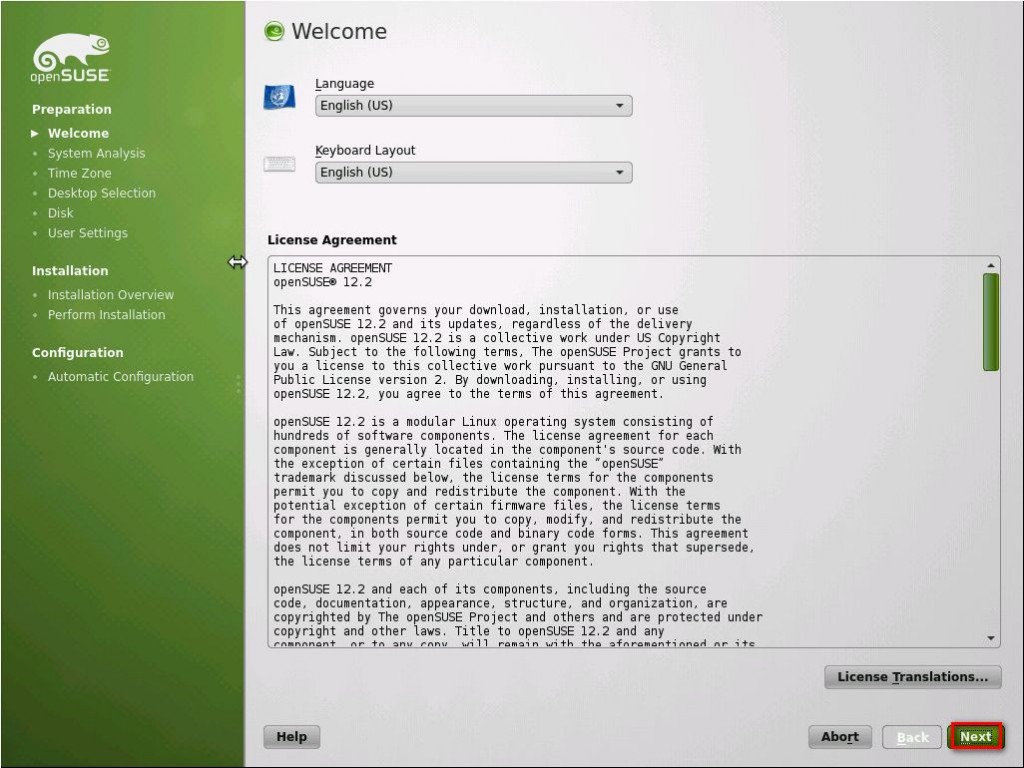
Read and accept License Agreement.
Image00003

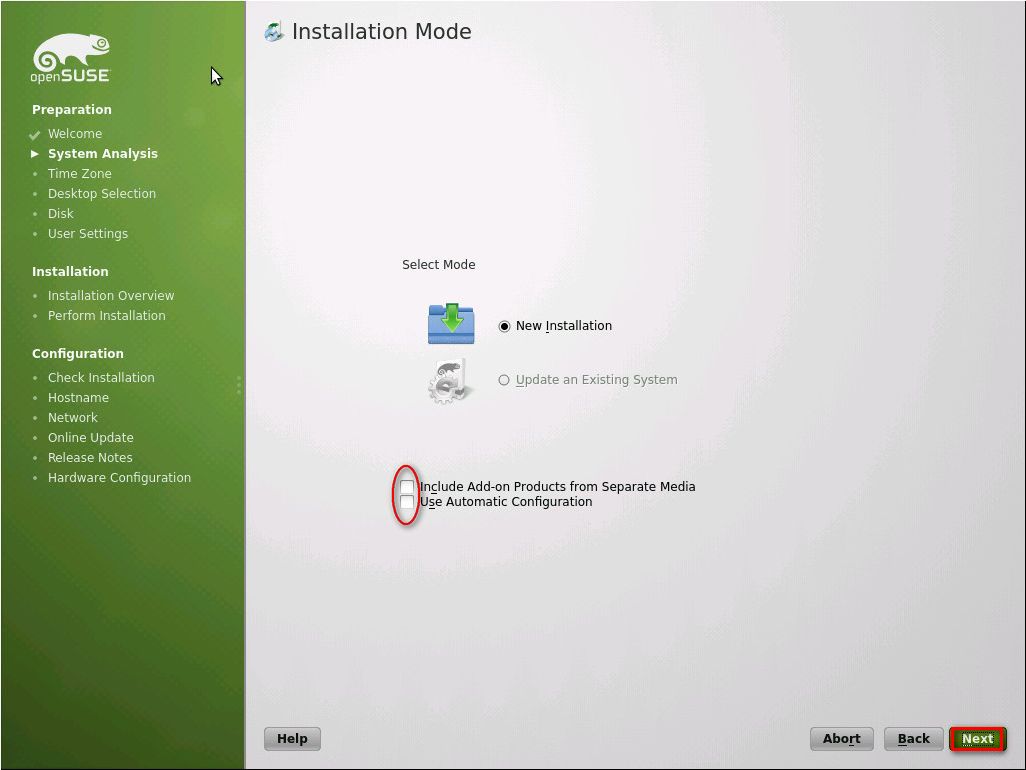
Choose “New Installation”, and you can also turn off option “Use Automatic Configuration”
Image00004

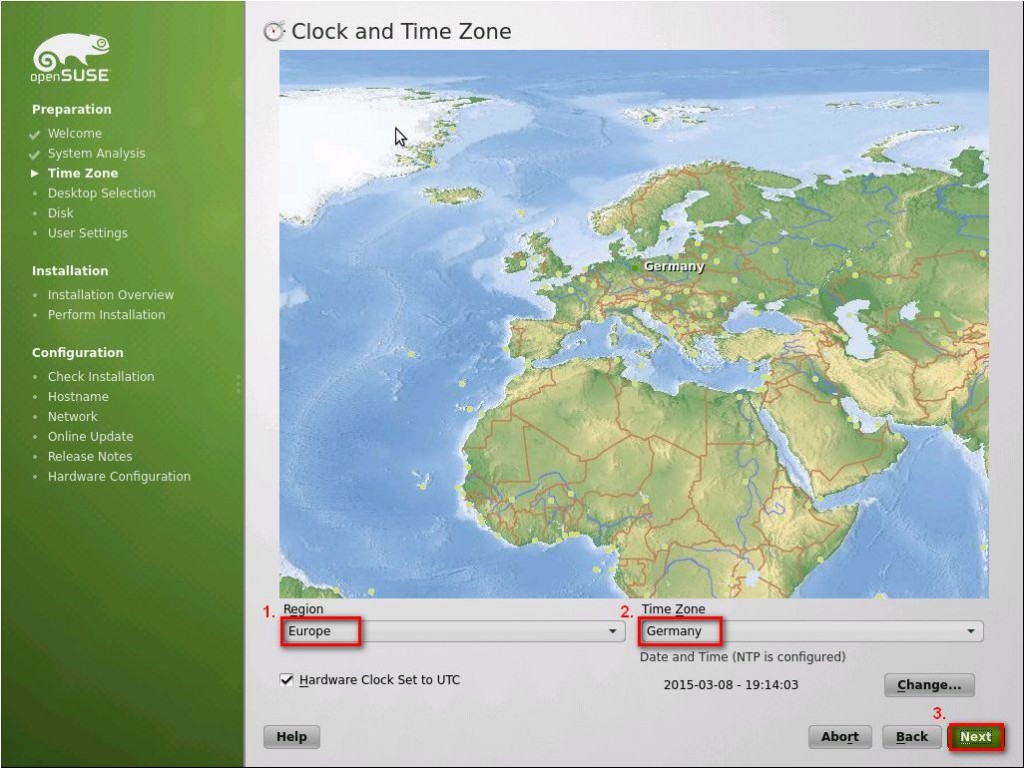
Set you Time Zone and set the clock.
Image00005

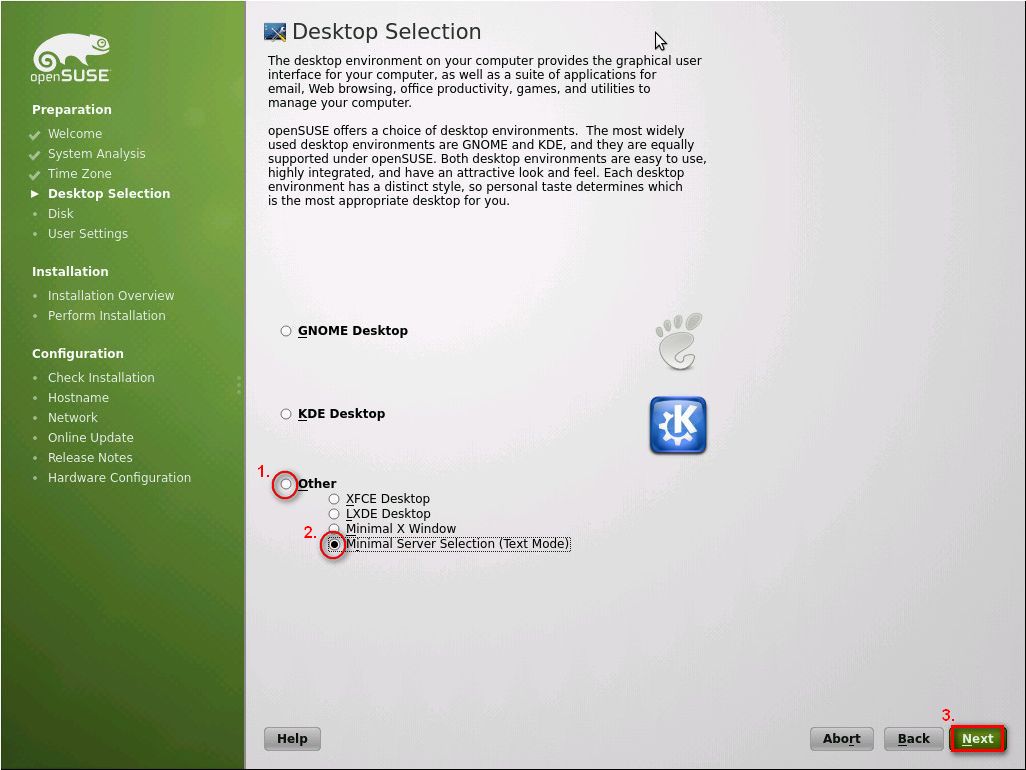
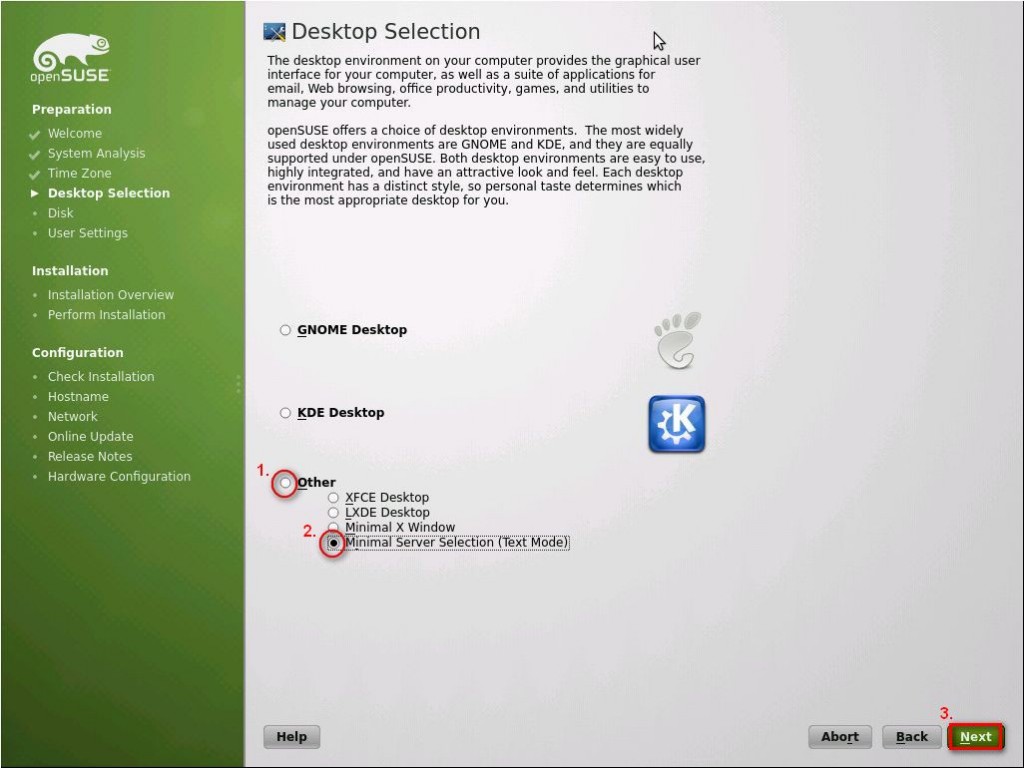
Choose “Other” and select “Minimal Server Selection (Text Mode)”
Image00006

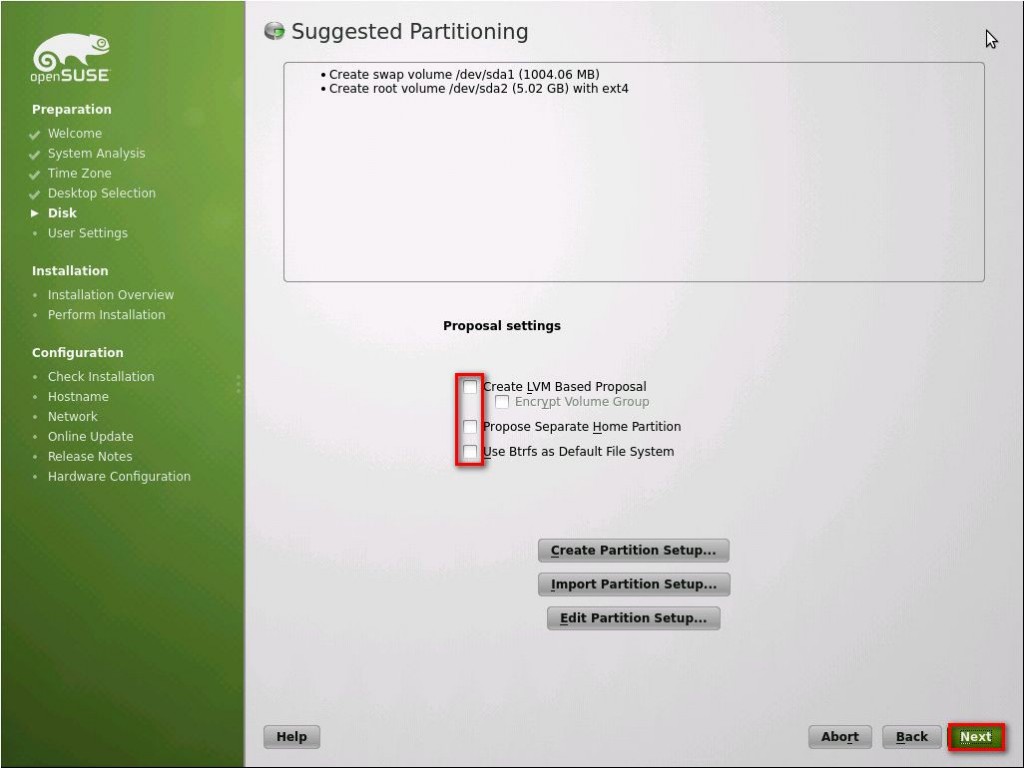
Accept suggested Partitioning.
Image00007

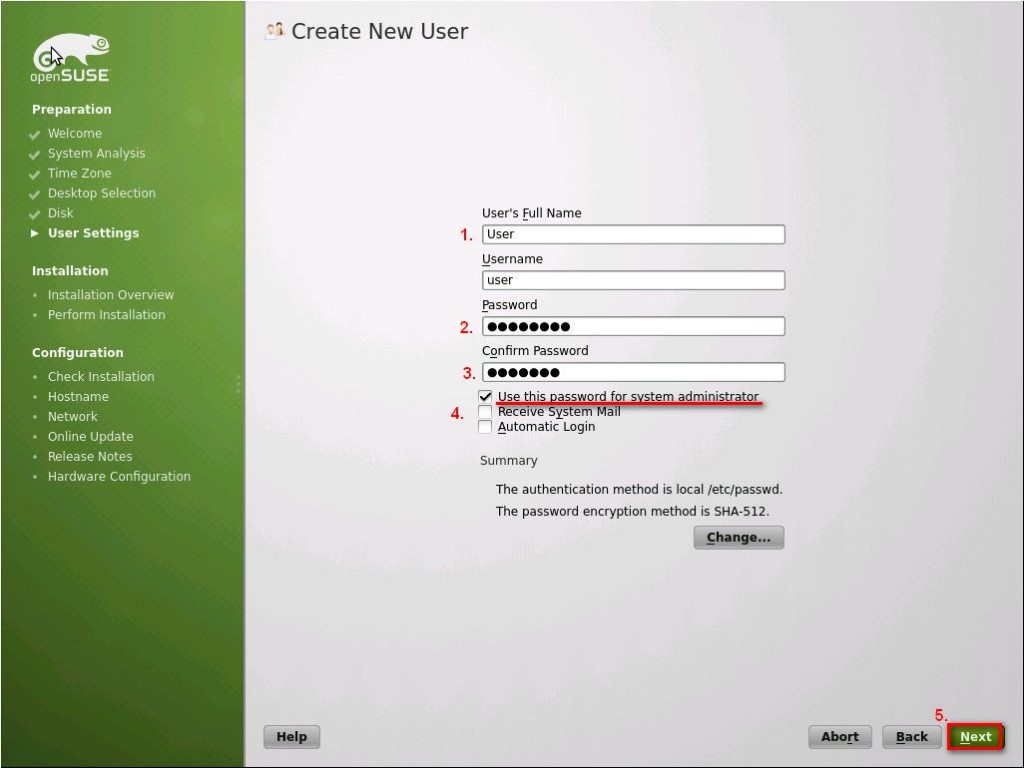
Create new user. Select “Use this password for system administrator” to set this password for root user also.
Image00008

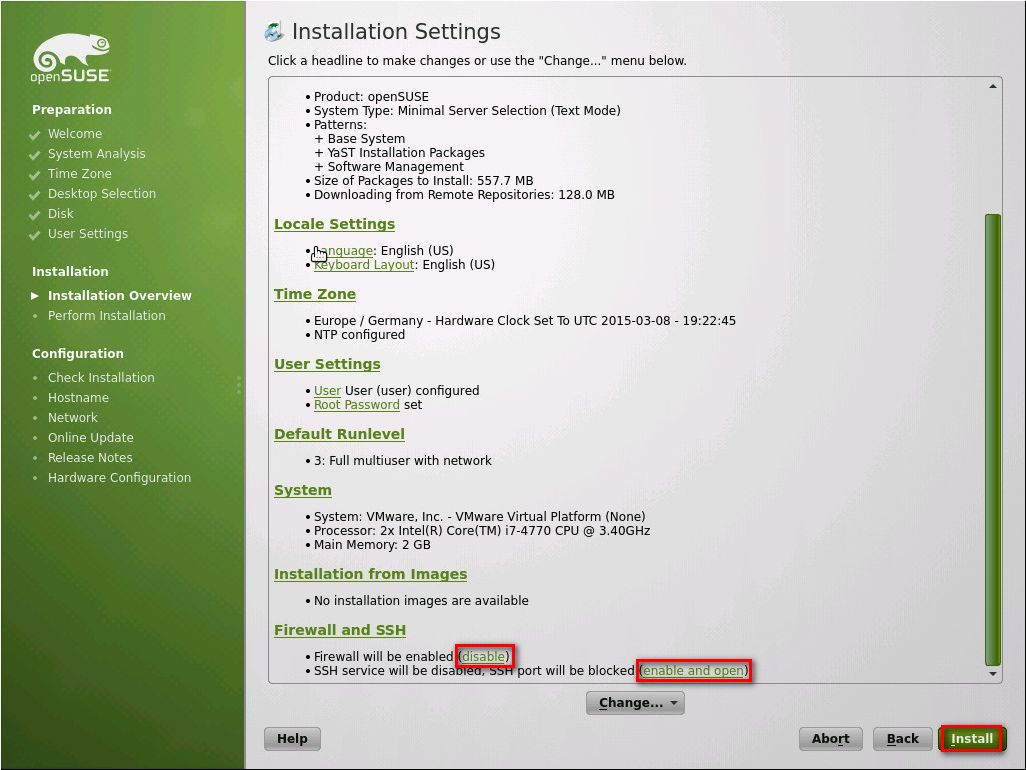
On this screen you can disable firewall and enable SSH service.
Image00009 Image00010

Image00011

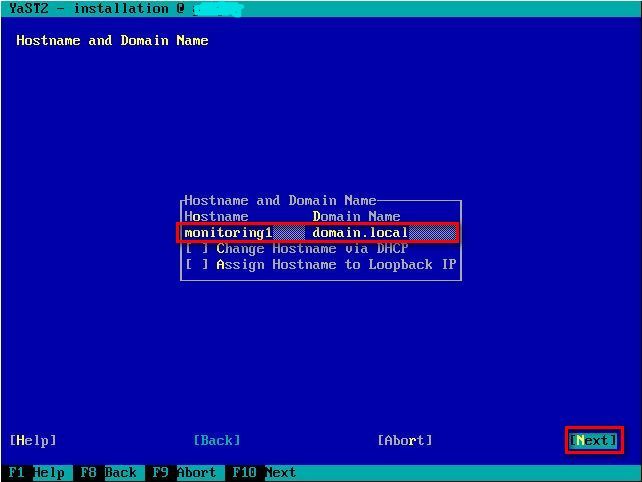
Installation will start and after reboot. You will be prompted to set “hostname”. Set the hostname and Domain Name.
Image00012

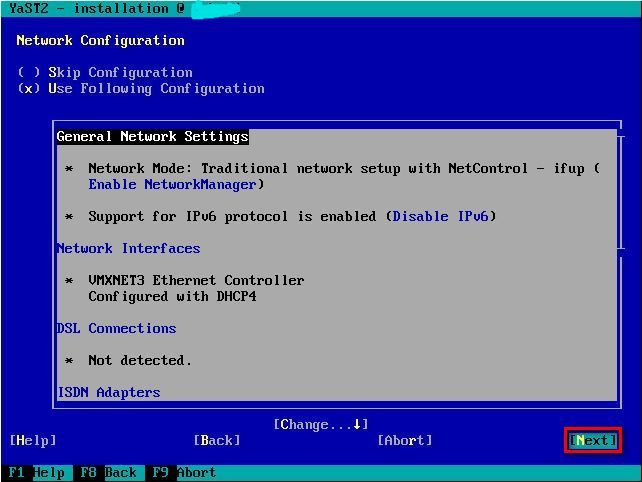
Click next to use Suggested network configuration or make changes if you need.

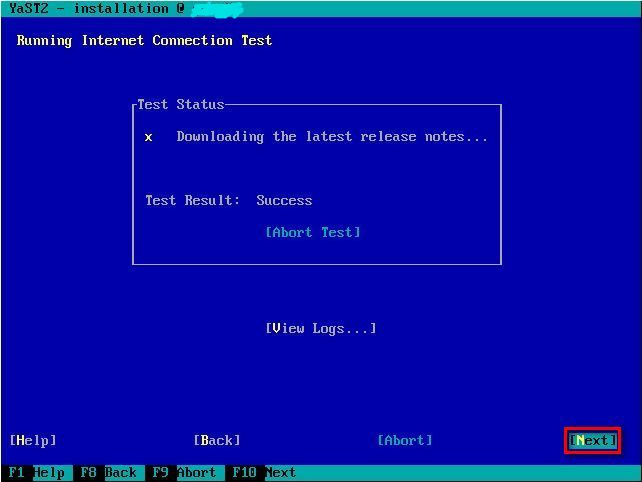
Click next to test internet connection.

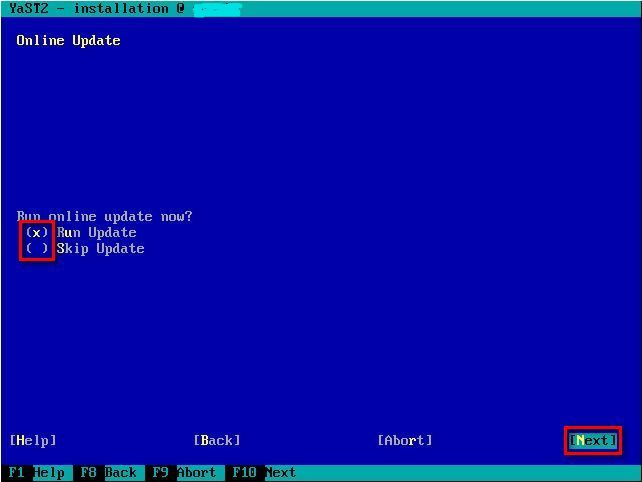
You can choose to Run Update and click next.

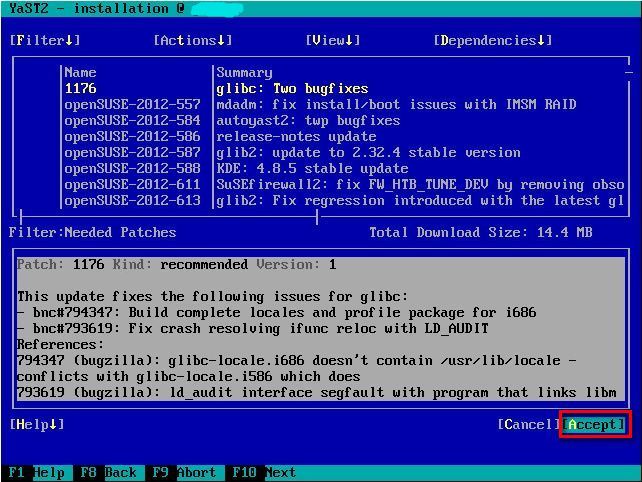
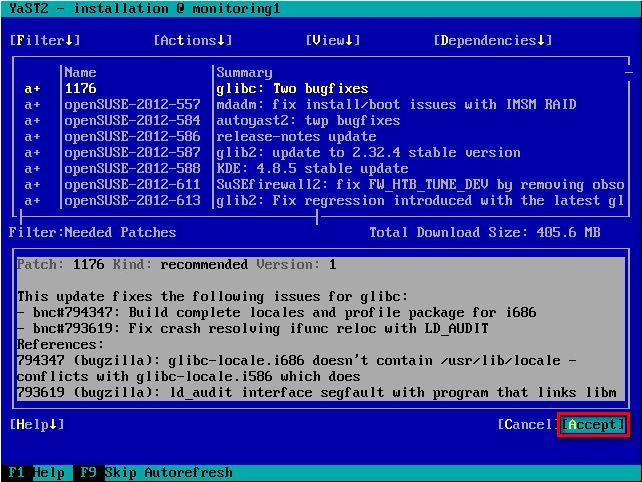
On the next screen choose accept to install first set of updates.

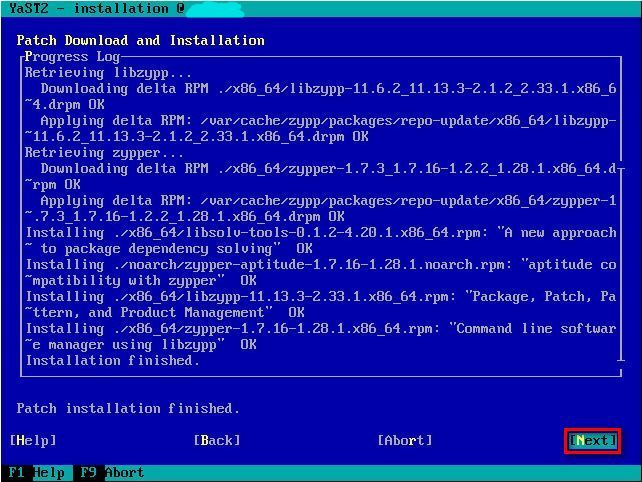
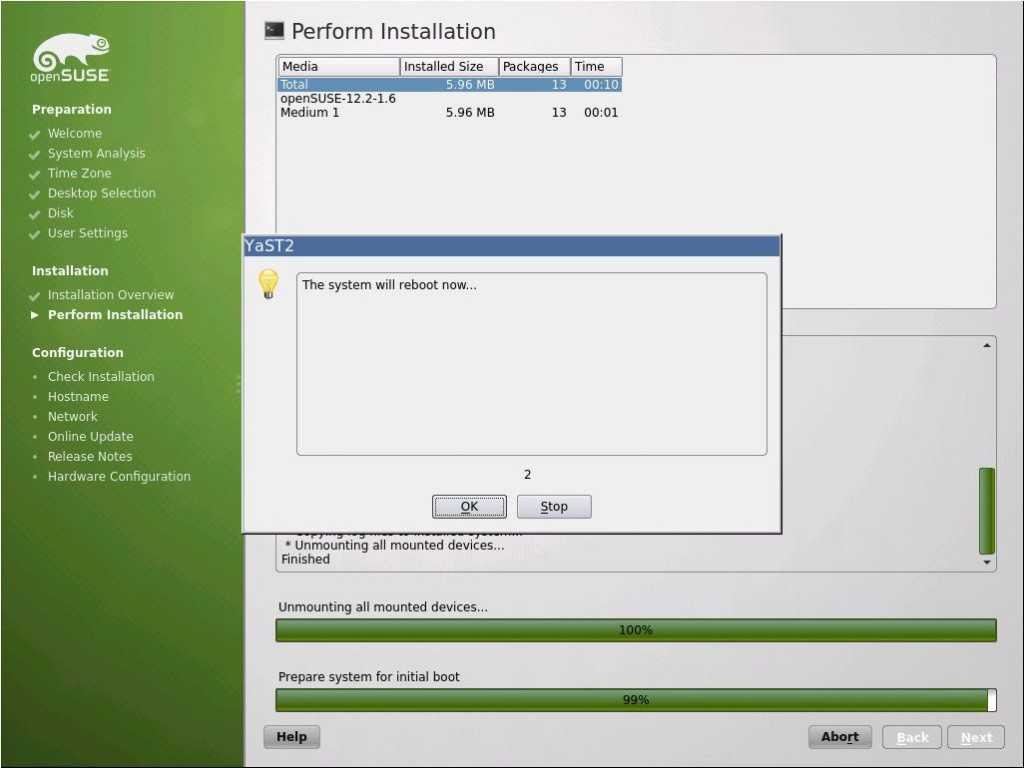
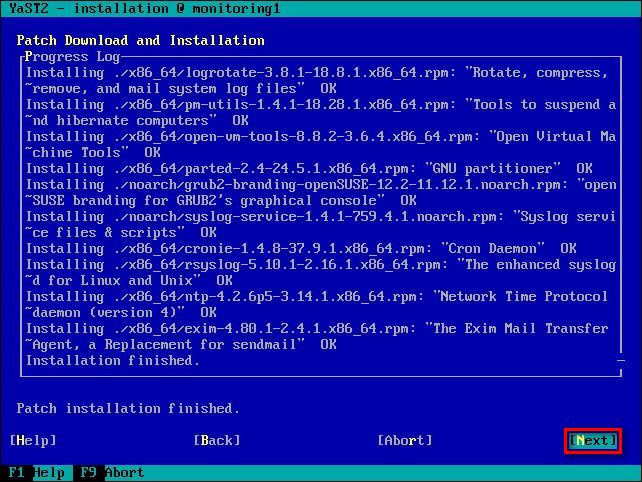
After installation package management will restart.
Image00019

Package management will start again. Choose Accept to install second set of updates.
Image00020 Image00021

System will reboot. Choose OK.
Image00022

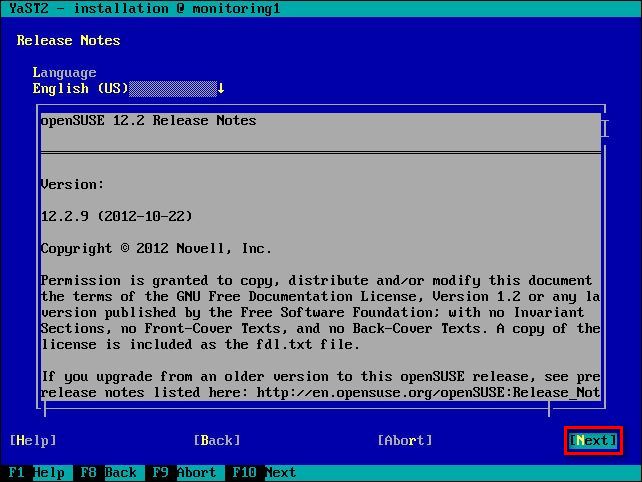
Next screen will show Release Notes. Choose Next.
Image00023

openSUSE installation is complete click Finish to exit.
Image00024

2. Installing openITCOCKPIT

At the time when i am writhing this latest avaliable version of install script on openiITCOCPIT stite is V0.3.5. This script will install openITCOCKPIT version 2.8.2.

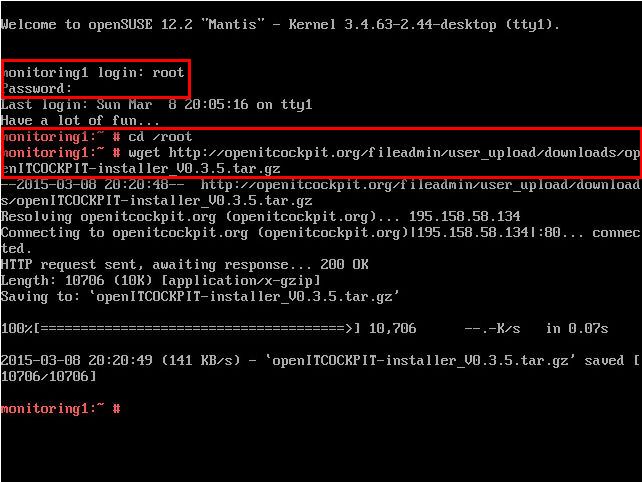
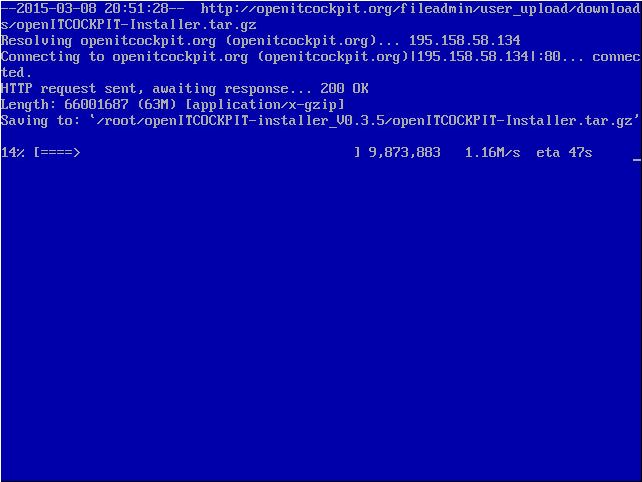
Login in as root and download openITCOCKPIT installation to /root/ folder
cd /root
wget http://openitcockpit.org/fileadmin/user_upload/downloads/openITCOCKPIT-installer_V0.3.5.tar.gz
Image00025

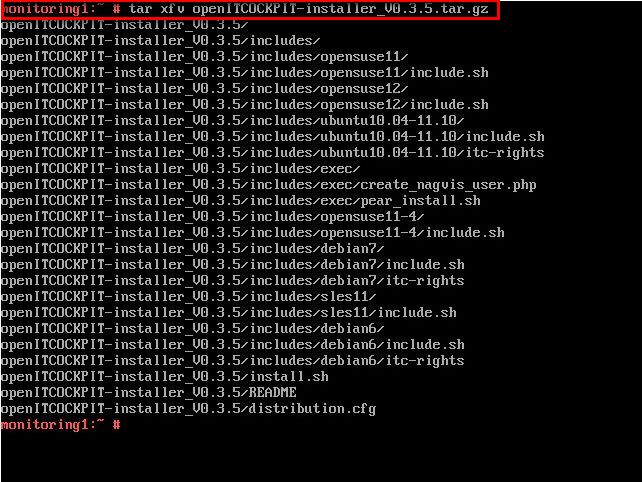
Unzip the file with following command:
tar xfv openITCOCKPIT-installer_V0.3.5.tar.gz
Image00026

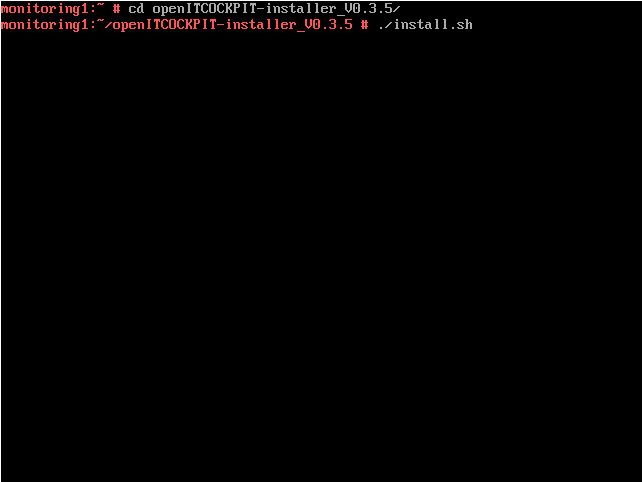
change directory to openITCOCKPIT-installer_V0.3.5
cd openITCOCKPIT-installer_V0.3.5/
and start installation by typing
./install.sh
Image00027

openITCOCKPIT installation will start. Press any key to continue.
Image00028

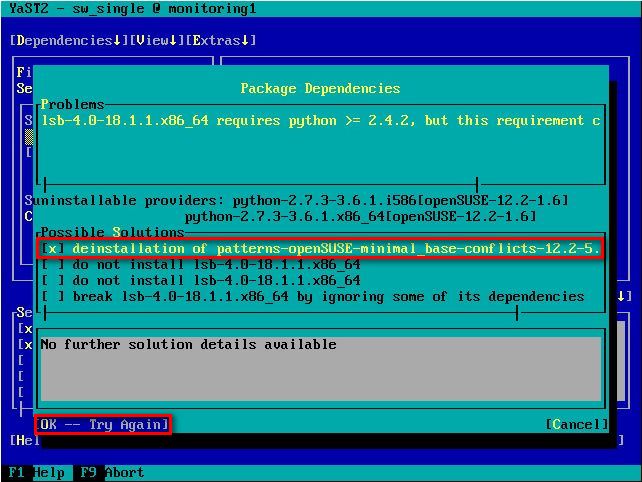
Install script will install all packages that you need to run openITCOCKPIT. To solve the problem with dependencies choose first option and choose OK – Try Again.
Image00029

On the next screen choose accept.Image00030

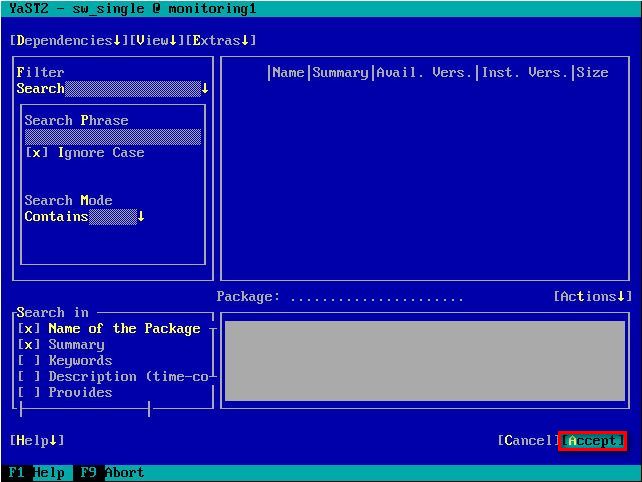
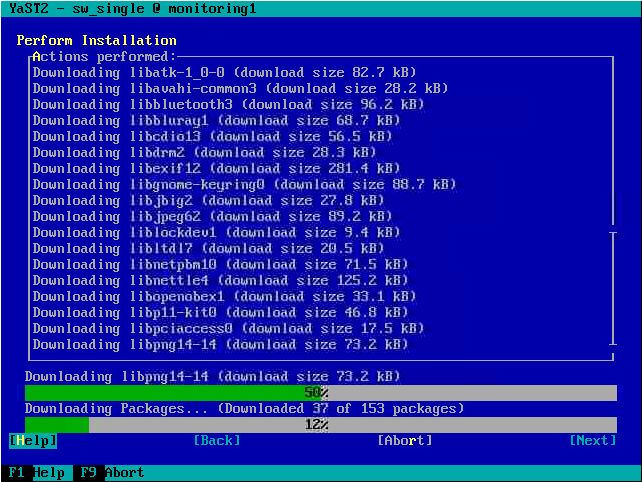
Next screen will show list of packages that will be installed. Choose OK to start downloading and installing.
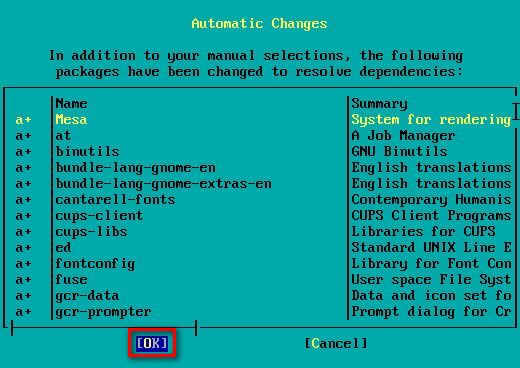
Image00031 Image00032

Now choose OK.Image00033

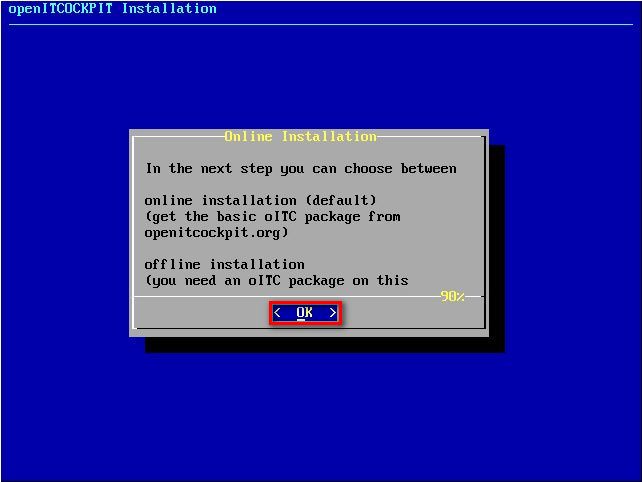
Select “Online” and press enter to download openITCOCKPIT from internet and install it.Image00034 Image00035

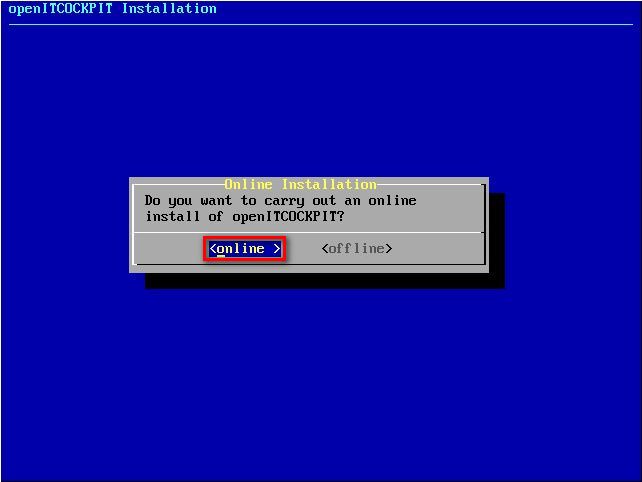
Accept the License agreement. Choose Accept.Image00036

Choose OK.
Image00037

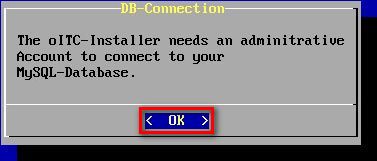
openITCOCPIT install script installed MySQL database server with blank password. In the nest step you need to enter credentials to connect to MYSQL database. To Connect to MySQL use user: root without password Image00038

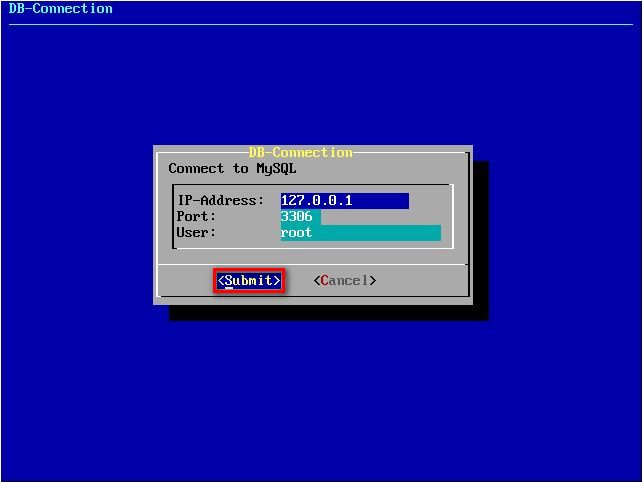
Leave the password field blank and choose Submit.Image00039

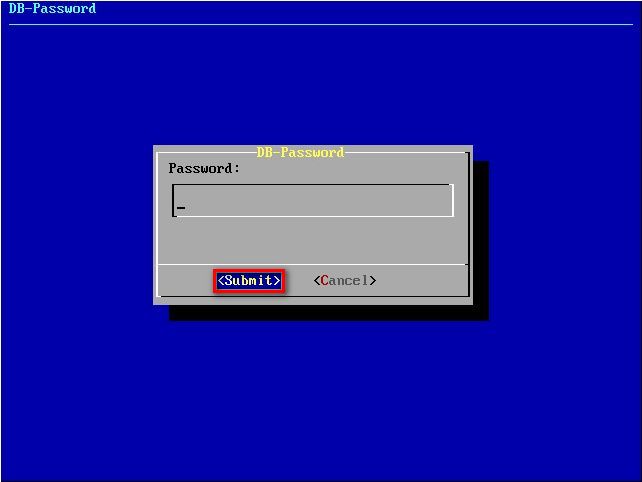
Now you will be prompted to set the password for MySQL database. Choose yes.Image00040

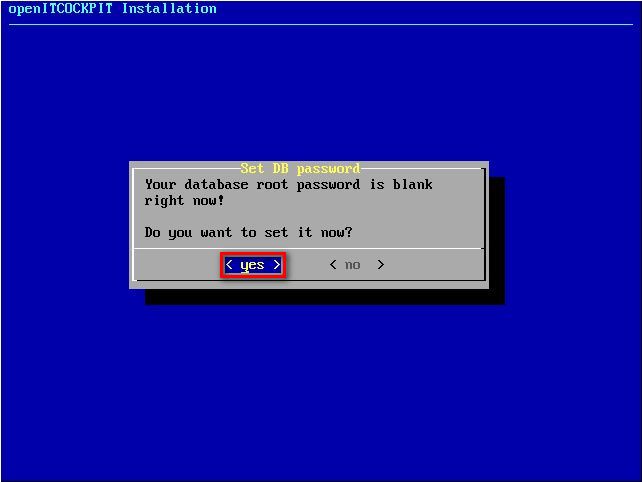
Type you new MySQL database password and choose Submit.Image00041

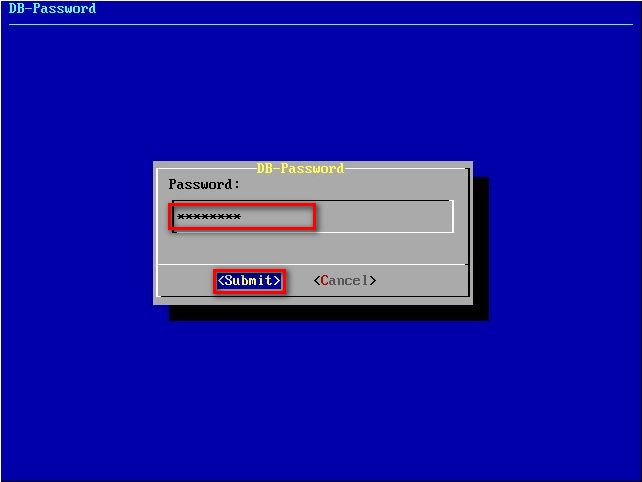
Now you are ready to set username and password for openITCOCKPIT user. Choose OK.Image00042

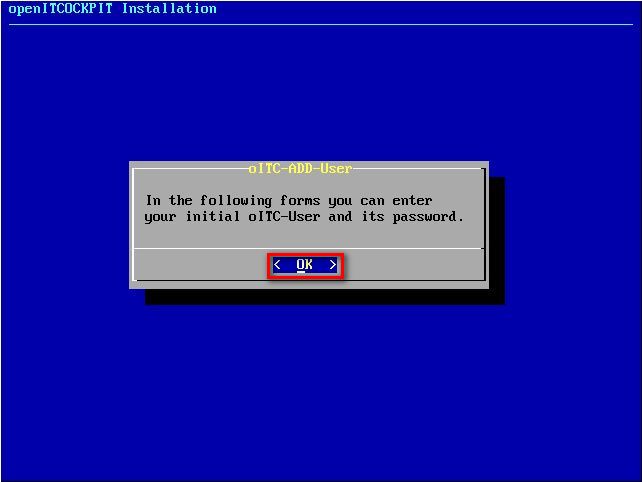
Default username for openITCOCKPIT is admin. You can keep it or change it. Choose Submit.Image00043

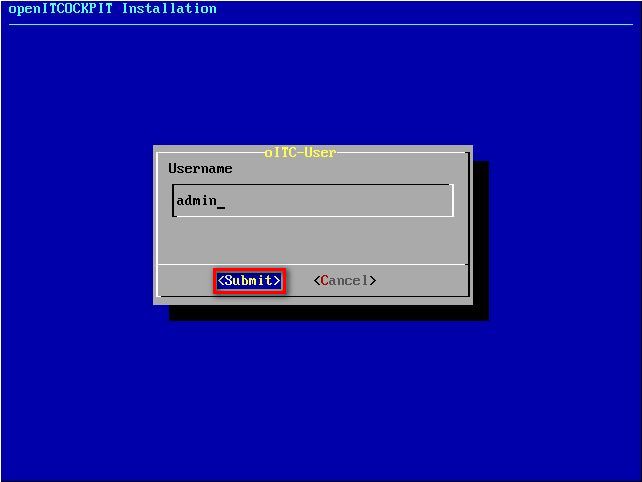
On the next screen set password for openITCOCKPIT user and choose Submit.Image00044

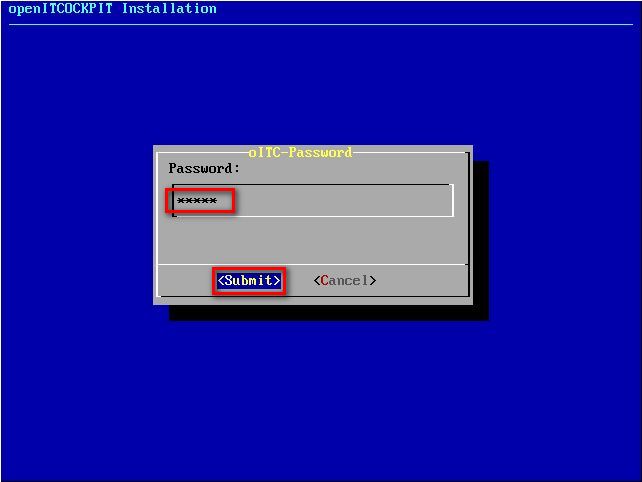
Retype the password and choose Submit.Image00045

Choose <yes> to start installing openITCOCKPIT.Image00046

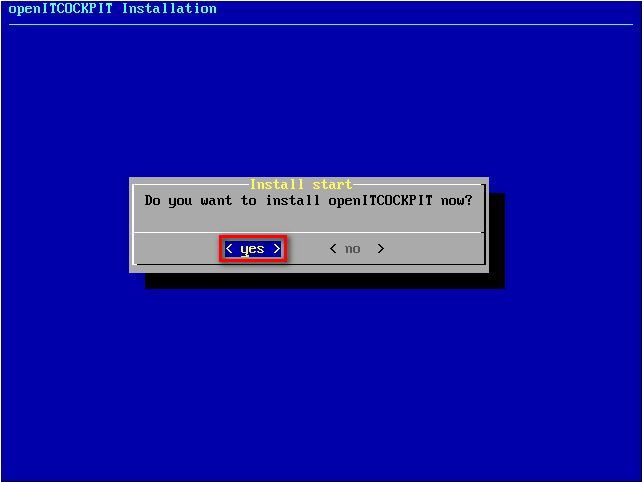
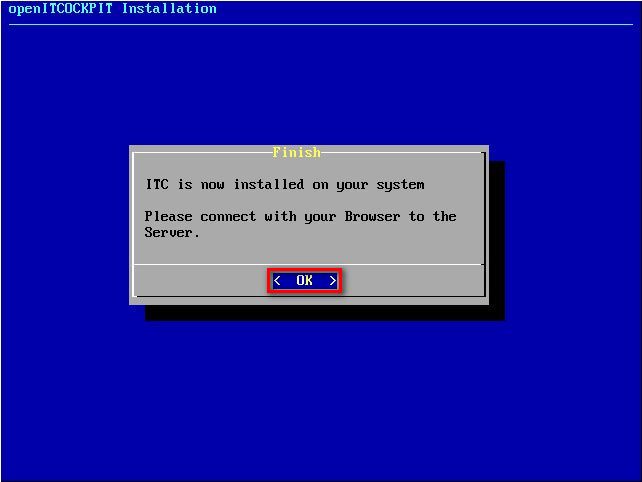
After installation is complete you will have to connect with you browser to continue.
Choose OK to continue.
Image00047

When installation window is closed in console type
ifconfig
to determinate your IP address. You will use this IP address in your browser to connect to openITCOCPIT.

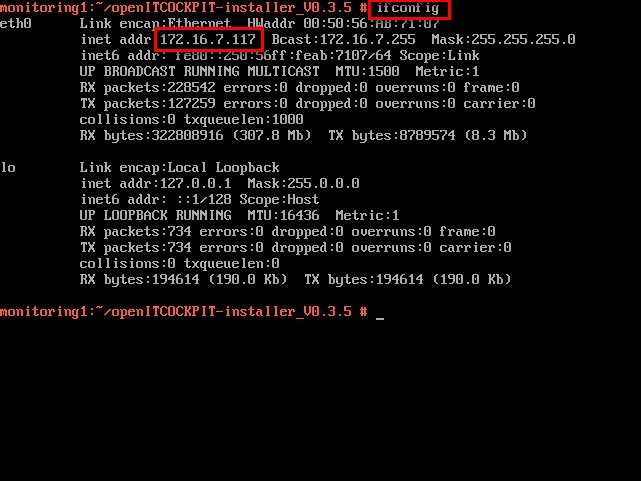
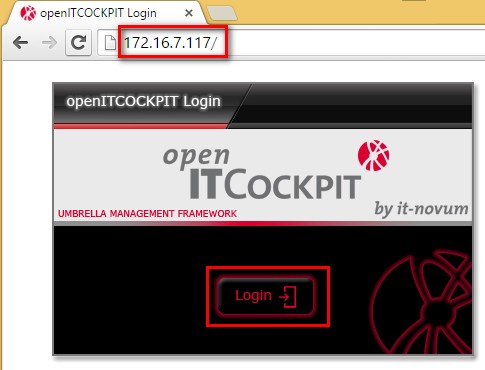
In this case IP address of openITCOCKPIT is 172.16.7.117. You will use you IP address that you found in previous step. We will use this IP to connect with browser. Click “Login” button.

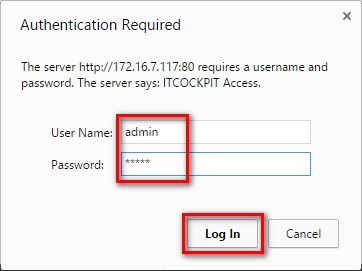
Enter openITCOCKPIT username and password that you set during openITCOCKPIT installation and click “Log In” button.

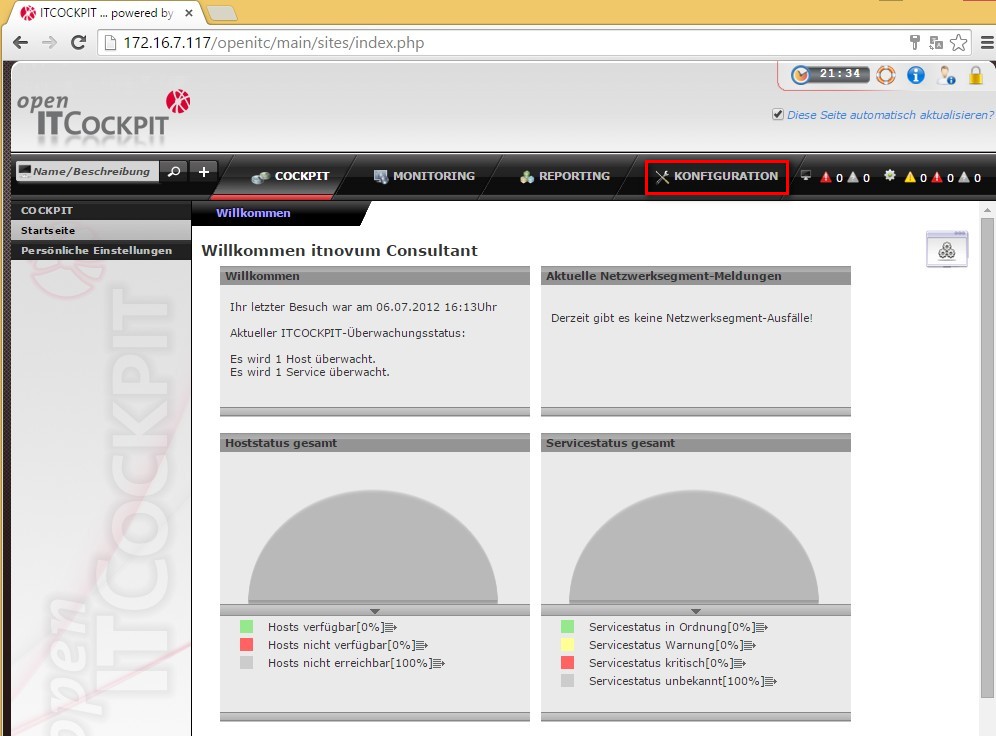
When you log in for the first time you will see openOTCOCKPIT first screen. First thing i will change is language to English. Click on “Configuration”
Image00052

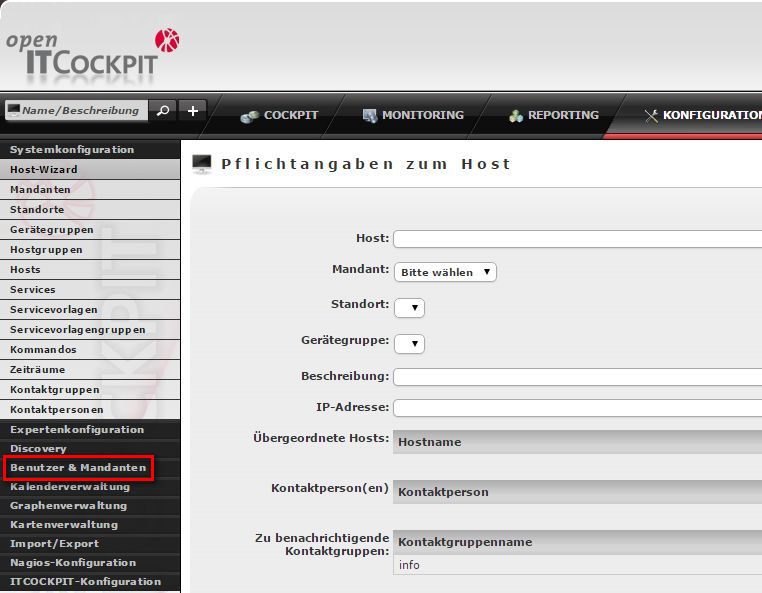
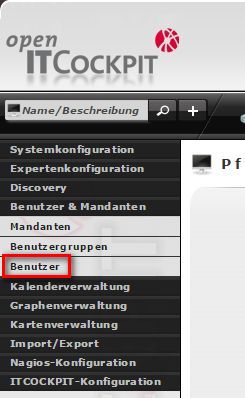
Click on “Benutzer & Mandanten”
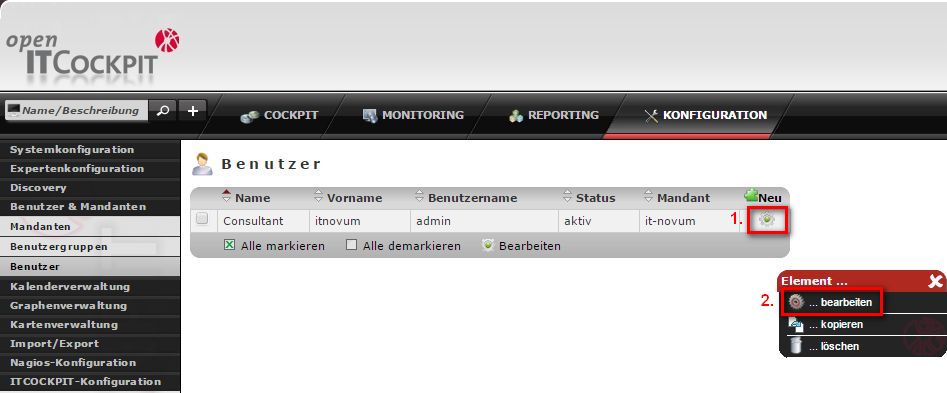
Image00053

Click on “Benutzer”
Image00054

Click on settings button and choose “…bearbeiten”
Image00055

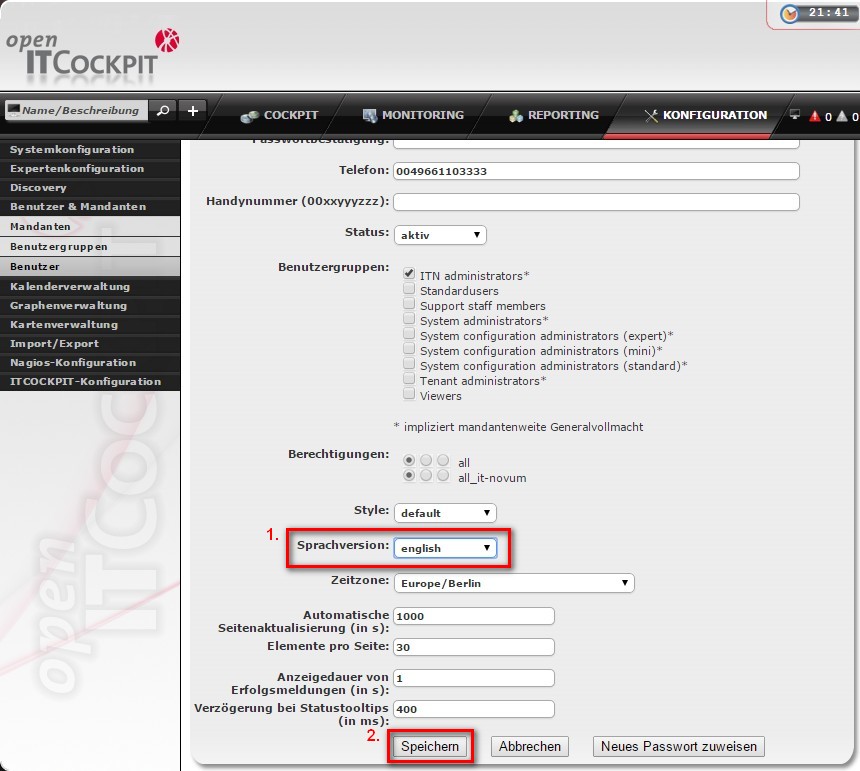
Scroll down and change “Sprachversion:” to “english” and click “Speichem”
Image00056

Log off, and log in again.
Image00058

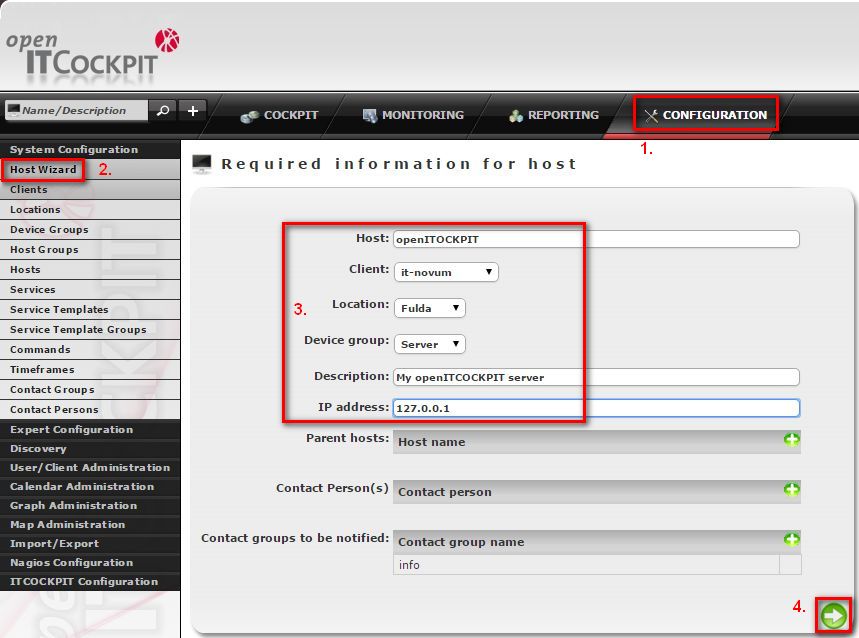
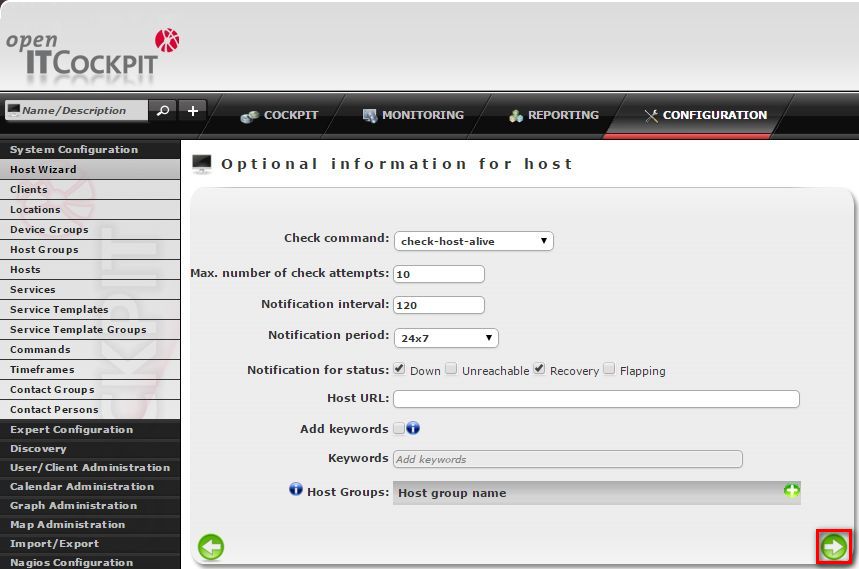
Now add first host for monitoring. When you click on configuration you will go to System Configuration, Host Wizard. Add openITCOCKPIT host itself. Fill the information like on the picture below and click green arrow in the right bottom corner to proceed.
Image00060

On this screen don’t change anything. Just click next.
Image00061

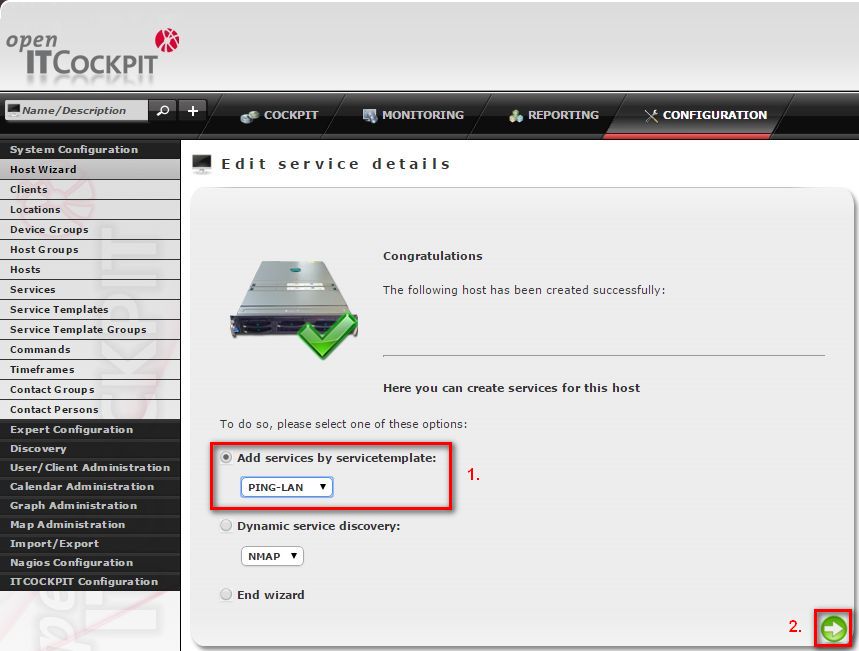
Choose service from predefined servicetemplates. Choose PING-LAN and click next.
Image00062

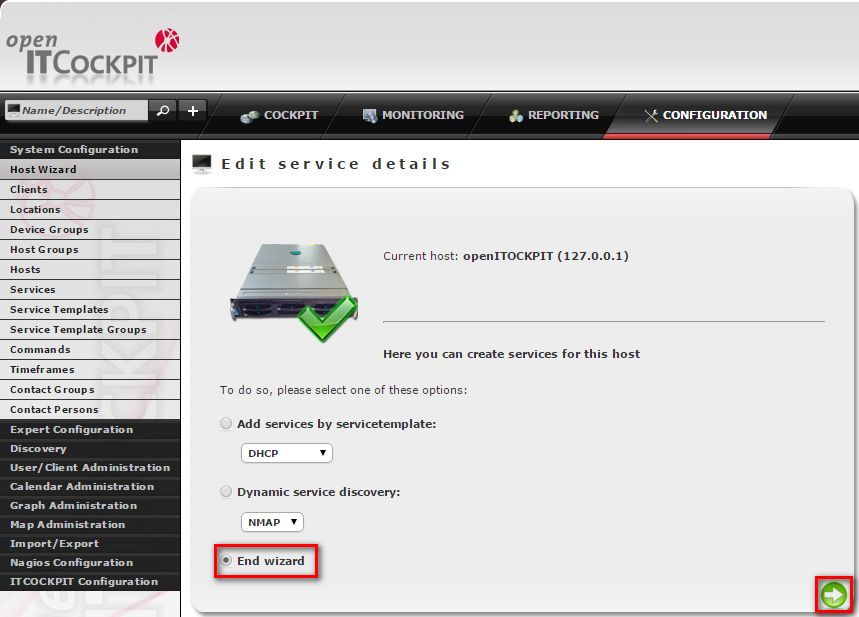
Just use default values and click next.
Image00063

Select “End wizard” and click Next.
Image00064

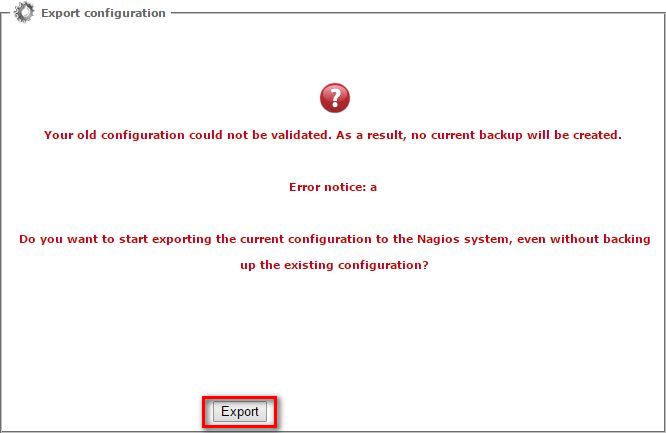
Now it’s time to do first export of configuration. Click on “Import/Export”, then click on “Export Configuration”. Then click on “Export” button.
Image00065

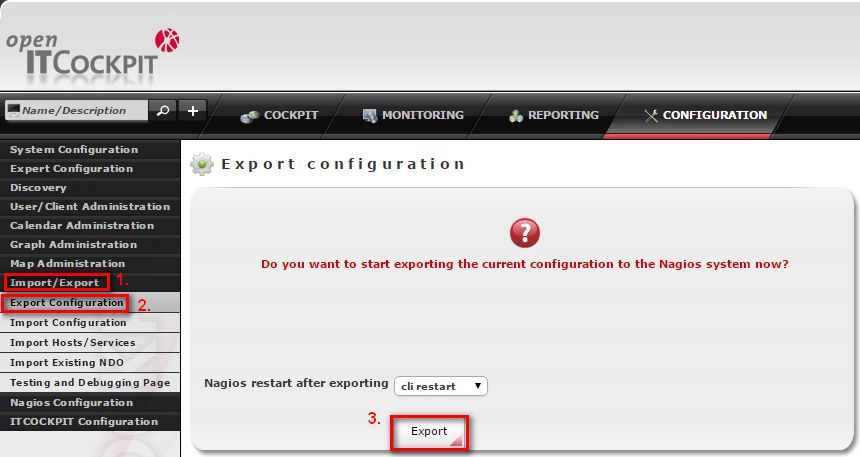
Because this is the first export of configuration you will receive this error message. Just click “Export” button.

Image00066

Install ‘compat-openssl097g-32bit’ package. ‘check_nrpe’ need this package to work
yast -i compat-openssl097g-32bit

Now we should set some services to start automatically when system starts. Go back to openSUSE conole and install package yast2-runlevel. Type
yast -i yast2-runlevelImage00067

Now type
yast runlevel add service=apache2,mysql,ndo,nagios-agents,npcd runlevels=2,3,5
Image00068

Now you can reboot you server and everything should be working fine. Type
shutdown -r now
Image00069

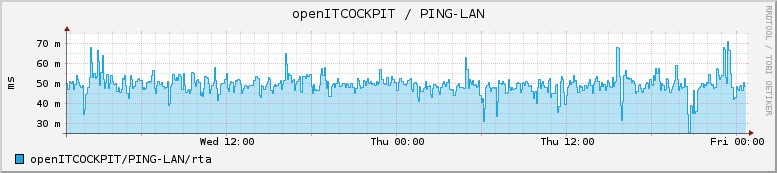
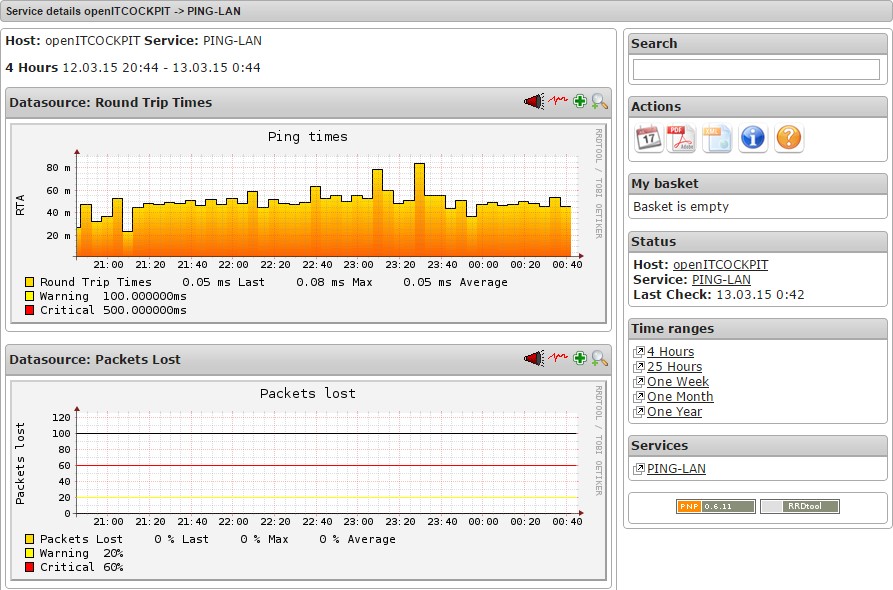
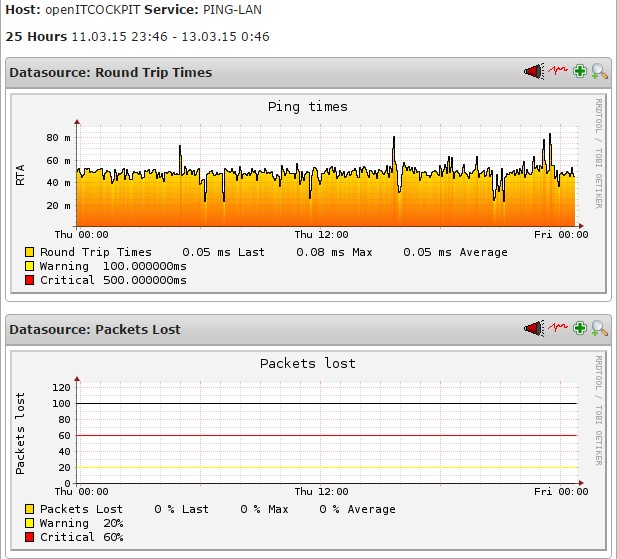
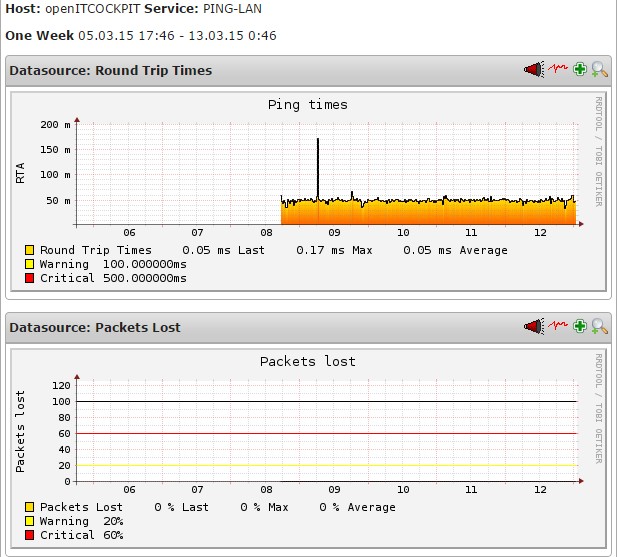
After couple of hours/days you will have some graphs generated.
Image00070
Image00071
Image00072
Image00073

Enjoy using your openITCOCKPIT.


problem with nagios plugins not installing:

http://roshan-techupdates.blogspot.rs/2014/11/compile-error-for-nagios-plugin.html